Table of Contents
Introduction
Keeping your car clean can often feel like a never-ending chore, but what if we told you there are some surprisingly effective tricks that can make this task a lot easier? Whether you’re a car enthusiast or just someone who wants to maintain a tidy ride, these innovative cleaning hacks can save you time and effort
Forget about the usual methods you’ve heard before – we’ve rounded up the top 5 car cleaning hacks you probably haven’t tried yet. From using household items to clever techniques, these tips will help you keep your car looking its best with minimal fuss. Read on to discover how you can transform your car cleaning routine with these game-changing hacks..
Use a Toothbrush for Detailing
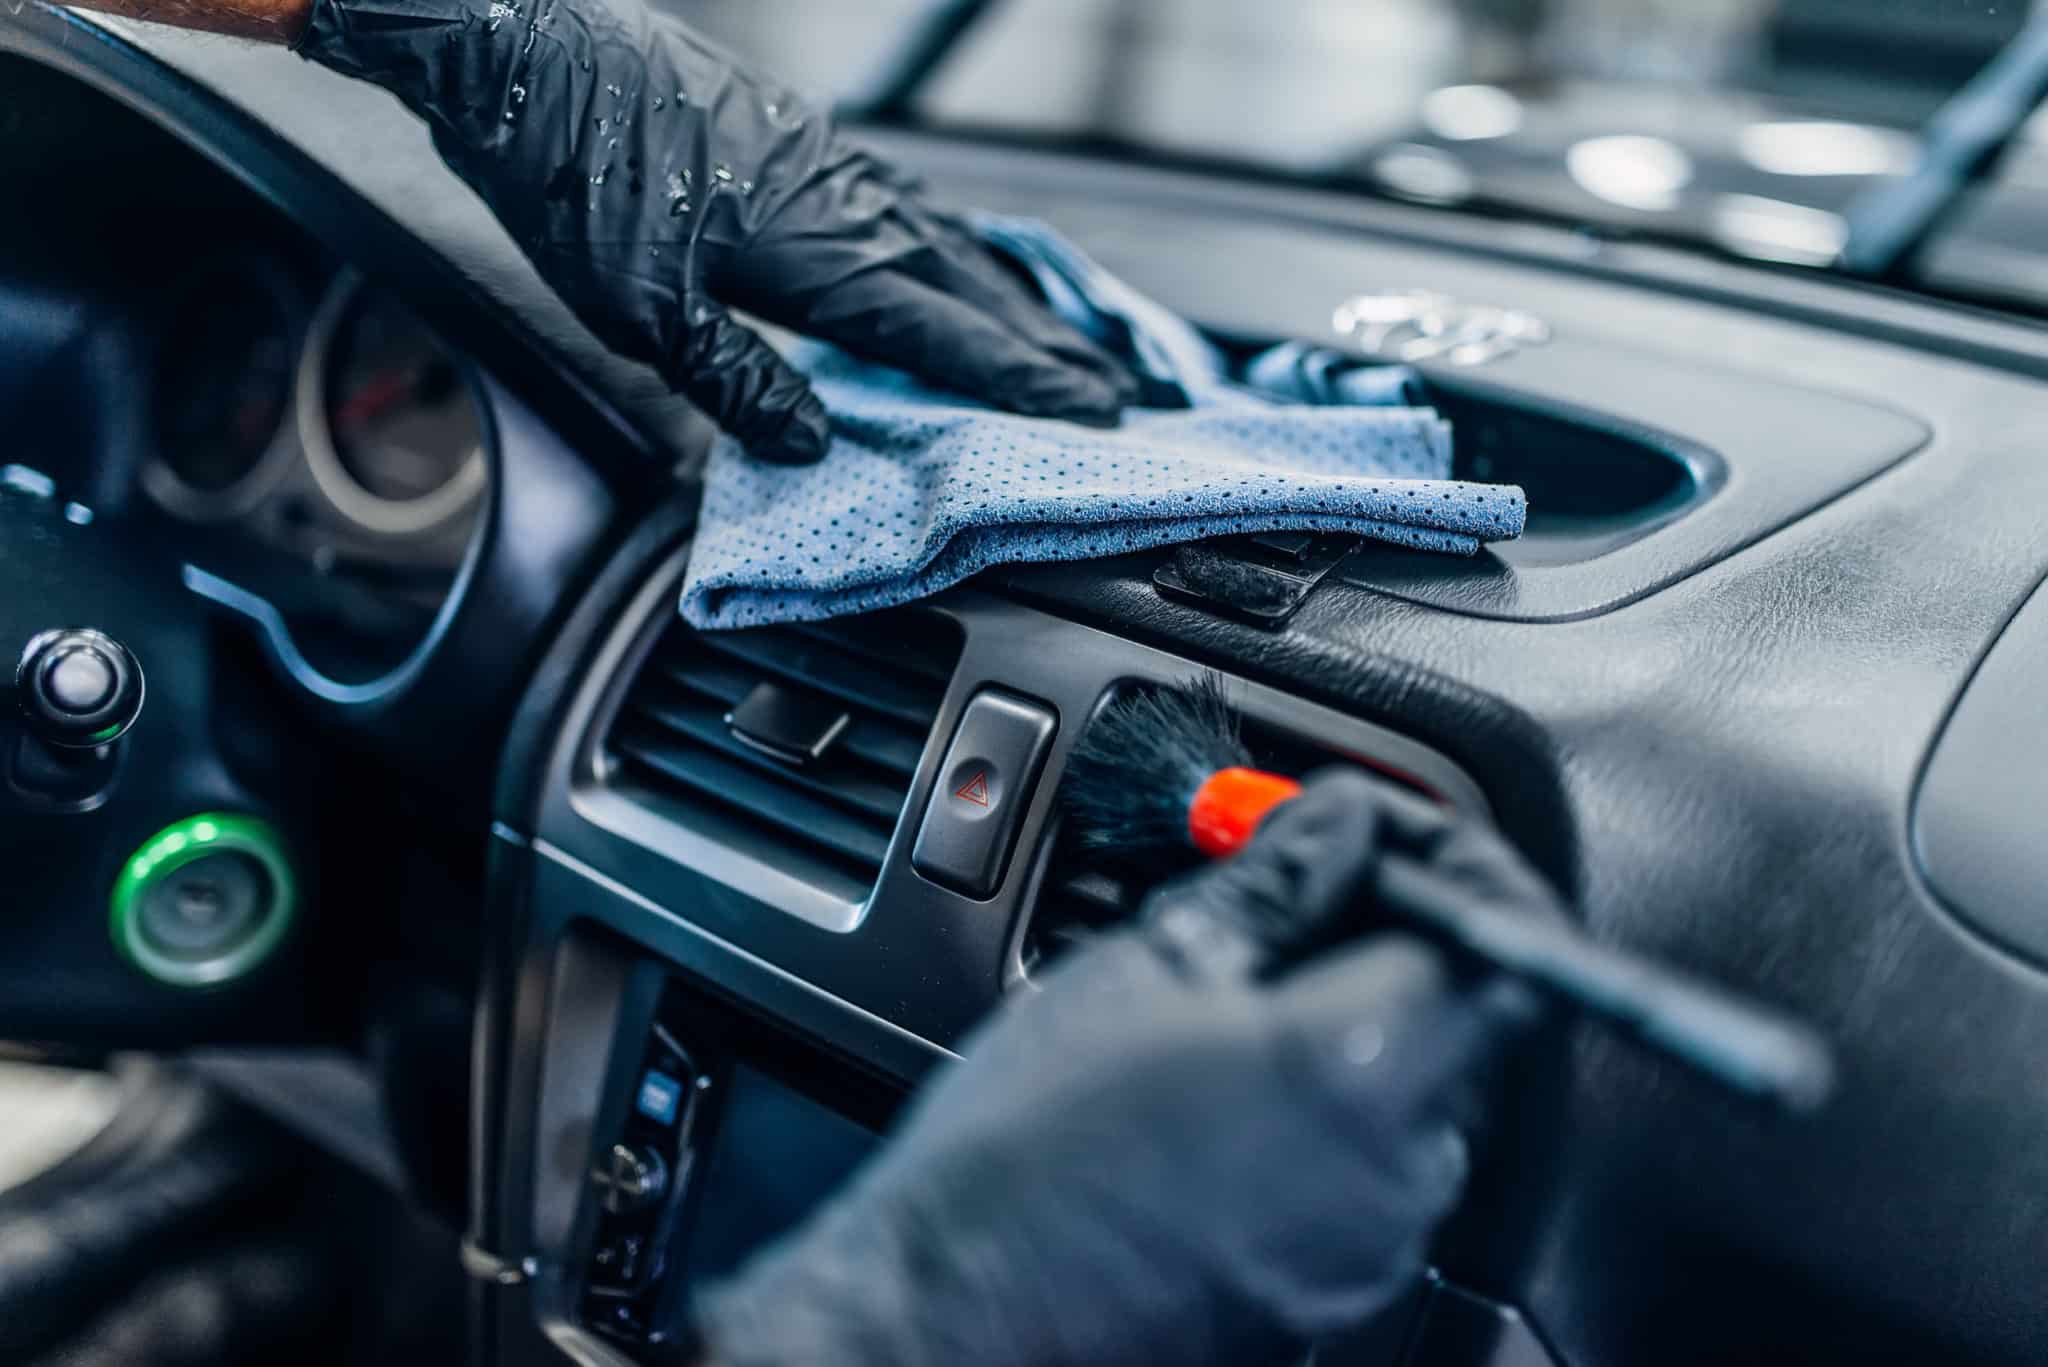
A toothbrush is an incredibly versatile tool that can transform your car cleaning routine, especially when it comes to tackling those hard-to-reach spots. Here’s how you can use a toothbrush to detail your car with precision:
1. Hard-to-Reach Spots
Car interiors are full of nooks and crannies that are difficult to clean with regular cloths or sponges. The bristles of a toothbrush are perfect for reaching into these tight spaces. Use a toothbrush to:
- Air Vents: Dust and dirt can accumulate in air vents, affecting the air quality inside your car. Gently brush the vents to dislodge and remove debris.
- Seams: Dirt can settle into the seams of seats and trim. A toothbrush can help you scrub these areas clean without damaging the material.
- Tiny Crevices: Small gaps between buttons, knobs, and trim can be tough to clean. The toothbrush’s bristles can reach into these tiny spaces, ensuring no dirt is left behind.
2. Remove Grime from Seat Stitching and Buttons
Seat stitching and buttons can be magnets for grime and dirt, making them look worn and neglected. Here’s how to tackle these areas:
- Seat Stitching: Dip the toothbrush in a mild cleaning solution and gently scrub along the seams of your seats. This will help lift and remove dirt embedded in the stitching without damaging the fabric or leather.
- Buttons and Controls: Car buttons and controls are often touched, leading to a buildup of oils and grime. Use a toothbrush to scrub around the buttons, ensuring they are clean and functioning properly.
3. Detail the Dashboard and Other Interior Components
The dashboard and other interior components can accumulate dust and dirt, detracting from the overall appearance of your car. Use a toothbrush to detail these areas:
- Dashboard: Gently brush around the edges and in the grooves of the dashboard to remove dust and dirt. This helps maintain a clean and polished look.
- Other Components: Use the toothbrush to clean around gear shifts, handbrakes, and other interior features that are difficult to reach with a cloth.
Baking Soda and Vinegar for Stain Removal
Stains on your car’s upholstery and carpets can be stubborn and unsightly, but with the right approach, you can effectively remove them without causing damage. Baking soda and vinegar are two household items that work wonders for cleaning and deodorizing. Here’s a complete solution for using these ingredients to tackle fabric stains in your car:
1. Create a Baking Soda Paste for Fabric Stains
Baking soda is excellent for lifting stains and neutralizing odors. Follow these steps to make and use a baking soda paste
- Ingredients:
- 1/4 cup baking soda
- Water (enough to make a paste)
- Instructions:
- Mix: Combine the baking soda with water to create a thick paste.
- Apply: Spread the paste over the stained area. Ensure the stain is fully covered.
- Let Sit: Allow the paste to sit for 15-20 minutes. This gives the baking soda time to break down the stain and absorb any odors.
- Scrub: Using a soft brush or cloth, gently scrub the stained area in a circular motion. This helps to lift the stain from the fabric.
- Wipe: Wipe away the paste with a clean, damp cloth. Repeat if necessary until the stain is gone.
2. Use a Vinegar and Water Mixture for Tougher Stains
Vinegar is a natural cleaner and deodorizer, making it ideal for tougher stains on upholstery and carpets. Here’s how to prepare and use a vinegar solution:
- Ingredients:
- 1 cup white vinegar
- 2 cups water
- A few drops of dish soap (optional for extra cleaning power)
- Instructions:
- Mix: Combine the vinegar and water in a spray bottle. Add a few drops of dish soap if desired.
- Spray: Generously spray the stained area with the vinegar solution. Ensure the area is well-saturated.
- Blot: Using a clean cloth or paper towel, blot the stain. This helps to lift the stain and absorb the vinegar solution.
- Scrub: For tougher stains, gently scrub the area with a soft brush or cloth.
- Rinse: Wipe the area with a damp cloth to remove any remaining vinegar solution. This helps to prevent any residual smell.
3. Blot and Scrub Gently
The key to effective stain removal without damaging the fabric is to be gentle. Here’s a step-by-step approach:
- Blot, Don’t Rub: Always blot the stain first to absorb as much liquid as possible. Rubbing can spread the stain and push it deeper into the fabric.
- Scrub Gently: When scrubbing, use a light touch. A soft brush or cloth works best to avoid damaging the fabric fibers.
- Repeat if Necessary: Stubborn stains may require multiple treatments. Be patient and repeat the process if the stain isn’t fully removed after the first attempt.
4. Dry the Area
After cleaning, it’s important to dry the area thoroughly to prevent mold and mildew growth:
- Air Dry: Open the car doors or windows to allow fresh air to circulate and help dry the fabric.
- Towel Dry: Use a dry towel to blot and absorb excess moisture.
Dryer Sheets for Bug and Tar Removal
Bugs and tar can be some of the most challenging substances to remove from your car’s exterior. Fortunately, dryer sheets offer an easy and effective solution. Here’s a complete guide on how to use dryer sheets to remove bugs and tar from your car:
1. Prepare the Dryer Sheet
Dryer sheets are designed to be gentle on fabrics, making them safe for use on your car’s paint. To use a dryer sheet for cleaning:
Moisten the Sheet: Lightly dampen a dryer sheet with water. This activates the fabric softeners in the sheet, making it more effective at loosening stubborn residues.
2. Apply to the Car’s Exterior
Once your dryer sheet is moistened, it’s time to start cleaning:
- Rub Gently: Take the damp dryer sheet and gently rub it over the areas with bug splatters or tar spots. Use light, circular motions to avoid scratching the paint.
- Bugs: For bug splatters, the dryer sheet will help to break down and lift the organic matter without requiring excessive scrubbing.
- Tar: For tar spots, the dryer sheet can help soften and lift the tar, making it easier to wipe away.
3. Benefits of Using Dryer Sheets
Using dryer sheets for cleaning your car comes with several advantages:
- Safe for Paint: The fabric softeners in dryer sheets are gentle on your car’s paint, ensuring that you don’t scratch or damage the surface while cleaning.
- Effective Cleaning: The texture of the dryer sheet, combined with the softeners, helps to break down and lift tough residues that regular soap and water may not remove.
- Fresh Scent: As an added bonus, dryer sheets leave a pleasant, fresh scent on your car’s exterior, enhancing the overall cleanliness.
4. Follow Up with a Rinse
After using the dryer sheet, it’s important to rinse the area to remove any residue:
- Rinse Thoroughly: Use a hose or a bucket of water to rinse the cleaned areas. This will wash away any remaining bug or tar residue as well as any leftover fabric softener from the dryer sheet.
- Dry the Surface: Use a clean microfiber towel to dry the car’s surface. This helps to prevent water spots and leaves the paint looking shiny and clean.
5. Repeat as Necessary
Depending on the severity of the bugs and tar on your car, you might need to repeat the process:
- Stubborn Spots: For particularly stubborn spots, you may need to repeat the cleaning process a few times. Be patient and gentle to avoid damaging the paint.
- Regular Maintenance: Incorporate this method into your regular car cleaning routine to keep bugs and tar from building up over time.
Cupcake Liners in Cup Holders
Keeping your car’s cup holders clean can be a tedious task, especially when they collect crumbs, spills, and sticky residues. Using silicone cupcake liners is a clever and practical solution to this common problem. Here’s a complete explanation of how this hack works and why it’s beneficial:
1. Place Silicone Cupcake Liners in Cup Holders
Silicone cupcake liners are flexible, durable, and perfectly sized to fit in most car cup holders. Here’s how to use them:
- Choose the Right Size: Select silicone cupcake liners that fit snugly into your car’s cup holders. They should cover the bottom and most of the sides to catch any debris.
- Insert the Liners: Place a liner in each cup holder. The silicone material will conform to the shape of the holder, staying in place without slipping.
2. Catch Crumbs and Spills
Once the liners are in place, they serve as a barrier to catch any mess:
- Crumbs: When you eat or drink in your car, crumbs from snacks can fall into the cup holders. The liners will catch these crumbs, preventing them from accumulating at the bottom.
- Spills: Small spills from drinks can be a hassle to clean out of cup holders. The silicone liners catch and contain these spills, making cleanup much easier
3. Easily Removable and Washable for Quick Cleanup
One of the best features of silicone cupcake liners is how easy they are to clean:
- Remove the Liners: When the liners get dirty, simply lift them out of the cup holders. The flexible silicone material makes them easy to remove, even if there are crumbs or liquid inside.
- Wash the Liners: Rinse the liners under running water or place them in the dishwasher for a thorough cleaning. Silicone is dishwasher-safe, so you don’t have to worry about damaging them.
- Replace: Once the liners are clean and dry, put them back in the cup holders. This quick and easy process keeps your cup holders spotless with minimal effort.
4. Helps Maintain a Cleaner and More Organized Interior
Using silicone cupcake liners offers several benefits for your car’s interior:
- Cleanliness: By catching crumbs and spills, the liners help to keep your cup holders clean, reducing the need for frequent deep cleaning.
- Organization: A clean car interior looks and feels more organized. With cupcake liners in place, you can enjoy a tidier space without the hassle of dealing with sticky or dirty cup holders.
- Longevity: Regular cleaning and maintenance of your car’s interior can help preserve the materials and keep your car looking newer for longer. Silicone liners protect the cup holders from stains and damage, contributing to the overall upkeep of your vehicle.
Coconut Oil for Leather Conditioning
Leather seats add a touch of luxury to your car’s interior, but they require regular maintenance to stay soft, supple, and free from cracks. Coconut oil is a natural and effective conditioner that can help keep your leather seats in top condition. Here’s how to properly use coconut oil for leather conditioning:
1. Preparation
Before applying coconut oil to your leather seats, it’s important to prepare properly:
- Clean the Leather: Use a leather cleaner or a mild soap and water solution to clean any dirt, oils, or residues from the leather. Allow the seats to dry completely before proceeding.
- Choose High-Quality Coconut Oil: Opt for organic, virgin coconut oil. This type of coconut oil is pure and free from additives, making it safe for use on leather.
2. Application Process
Once your leather seats are clean and dry, follow these steps to condition them with coconut oil:
- Apply a Small Amount: Take a small amount of coconut oil (about a teaspoon) and apply it to a clean, dry microfiber cloth. You want just enough to create a thin, even layer on the cloth.
- Rub into the Leather: Gently rub the coconut oil into the leather seats using circular motions. Focus on one section at a time to ensure thorough coverage.
- Allow Absorption: Let the coconut oil sit on the leather for about 30 minutes to an hour. This allows the oil to penetrate the leather, moisturizing it from within.
- Buff Off Excess: After allowing the oil to absorb, use a clean microfiber cloth to buff off any excess oil. This step helps to prevent a greasy residue and ensures a smooth finish.
3. Benefits of Coconut Oil
Using coconut oil for leather conditioning offers several benefits:
- Conditions and Softens: Coconut oil deeply moisturizes the leather, keeping it soft and supple. This helps to prevent cracks and dryness, prolonging the life of your leather seats.
- Shines Leather: In addition to conditioning, coconut oil leaves a natural shine on leather, enhancing its appearance.
- Natural and Safe: Coconut oil is a natural product, free from harsh chemicals that can damage leather over time.
- Pleasant Scent: Coconut oil has a mild, pleasant scent that can leave your car interior smelling fresh.
4. Use Sparingly
While coconut oil is beneficial for leather conditioning, it’s important to use it sparingly:
- Avoid Over-Application: Using too much coconut oil can leave a greasy residue on the leather, which may attract dust and dirt.
- Moderation is Key: A little goes a long way with coconut oil. Start with a small amount and add more if needed, focusing on achieving a thin, even layer.
Conclusion
Maintaining your car’s interior is essential not only for aesthetics but also for preserving its value and comfort. The innovative car cleaning hacks discussed – from using a toothbrush for detailed cleaning to applying coconut oil for leather conditioning – offer practical and effective solutions to common challenges.
Whether you’re a car enthusiast or simply looking to maintain a clean and comfortable driving environment, these hacks offer practical solutions that can transform your car cleaning routine.